Since UKHAS does a better job explaining this program than I do, I’ll quote their description:
“Dl Fldigi is an adapted version of the excellent free FLdigi soundcard decoding software. It takes the audio from your radio, decodes the balloon's signal, and then sends the telemetry it's found over the internet to a server running habitat, which plots the payloads position on to the SpaceNear map.”
The software can be a bit finicky when first learning it, so I’ll go step by step. Firstly, download the Windows binary from this page:
https://ukhas.org.uk/projects:dl-fldigi
After going through the installation process and starting the program, you should be greeted by a setup wizard. Hit next on the screen that appears and fill in the information as follows:
- Callsign: The <=6 digit string you used for your payload ID when setting up the Pi.
- Name: Empty.
- QTH: Empty.
- Locator: FUNcube Dongle Pro+
- Antenna: Yagi (This will be explained later.)
- Radio: Radiometrix MTX2
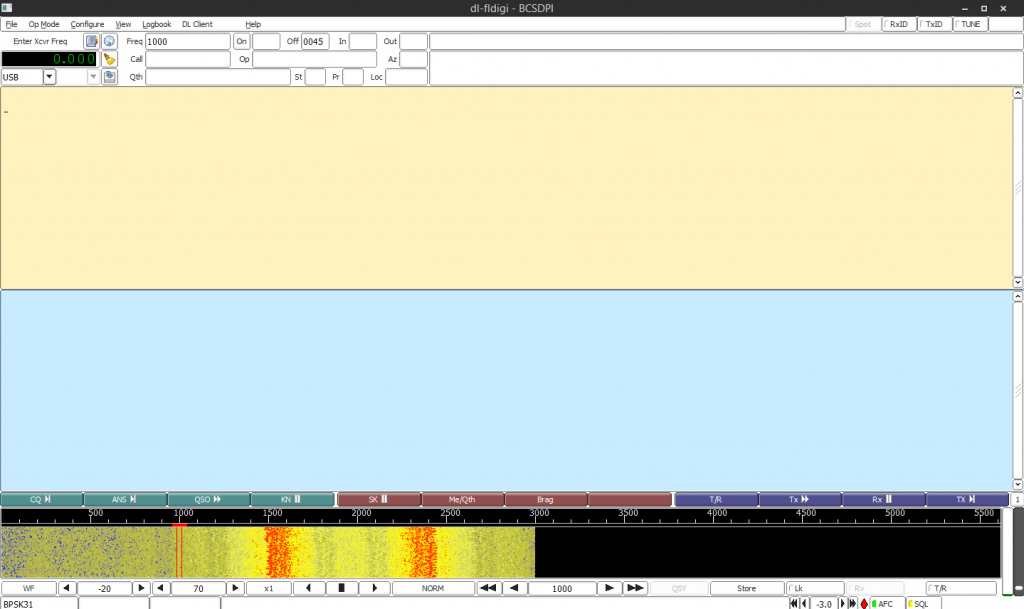
On the next page, check the PortAudio box and select “CABLE Output (VB-Audio Virtual Cable)”. Since there won’t be any playback anyway, leave that section as is. The next page can be skipped, so go right by that one and click finish. At this point, you should be greeted with a window that looks like this:

Fig. 1: Dl-fldigi data decoding software.
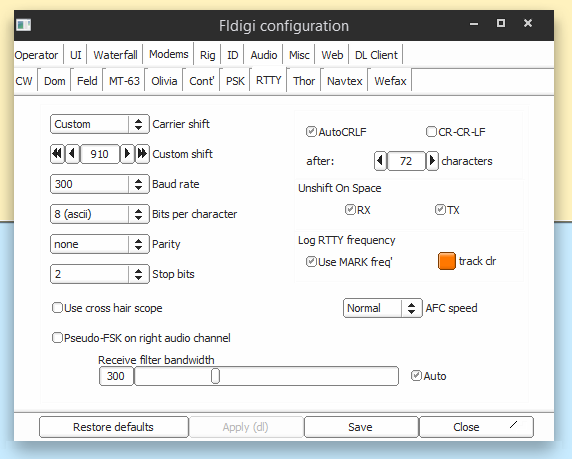
We’ll now need to configure dl-fldigi to have the correct settings for our payload. On the menu bar, go to:
Op Mode -> RTTY -> Custom…
Set the settings so that the dialog matches this screenshot exactly.

Fig. 2: Dl-fldigi settings.
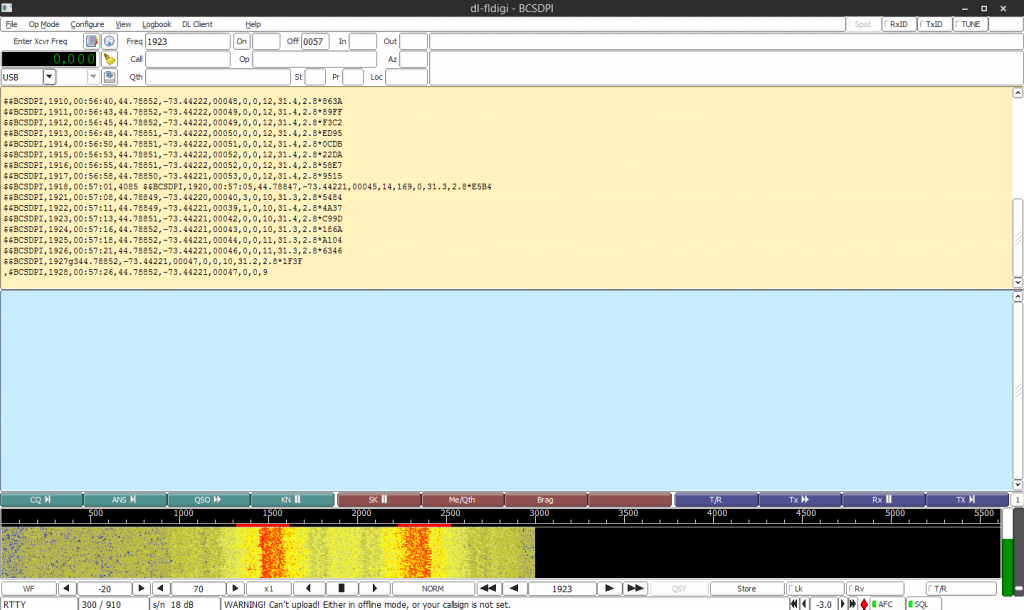
On the bottom graph, click exactly between the two bright spots so that the two red cursors roughly line up with the spots. If all is well, dl-fldigi should start decoding data, which will appear on the main window. There may be a few errors, but so long as the data is mostly readable, you’ll be fine.

Fig. 3: Dl-fldigi decoded telemetry data.


